Tuesday, March 15, 2011

A Few Of My Favourite Things...

I'd like to think I'm not alone but sometimes I get so fixated on something that it becomes a freakish obsession. There is no rhyme or reason. It might be a particular dish, like spaghetti with olive oil, garlic and parmesean which I ate three times a week for a month straight. Other times it's a spice, like the time when I put Montreal Steak Seasoning on anything I roasted. It doesn't have to be healthy- for example, I HAD to have a salami sandwich and one Twix finger everyday at lunch (and only at lunch) for the first six weeks after I had my son; it can even be a restaurant. My long running stalker like obsession with Royal China dim sum hasn't ceased after ten years.

Which brings me to my current tasty delight and an introduction to a new feature on this blog. On the right hand side of the screen you will be able to check back and see what I currently cannot get enough of. There'll be a link to this posting where I'll keep track of all my fave flavours.

So what am I all over as I type you ask? Rosebud Preserves Piccalilli. L-O-V-E IT!

I was never a huge fan of piccalilli. For someone who has half a fridge of condiments (along with ones I hide in the cupboard from The Boy), that's saying a lot. For anyone not familiar with it, it's a pickle made up of various vegetables chunks in a tangy mustard and tumeric sauce.

Perhaps not so bizarrely, when I was pregnant, one of my few cravings was for a toasted, always toasted, ham and cheese sandwich with extra piccalilli from Fernandez and Wells in Soho.

Not so much as a second thought had been given to piccalilli in months. Not until last week when I went to Mortimer and Bennett to have a browse. Mortimer and Bennett's is a great little shop if you're ever in Chiswick. At the back of the tiny store, an array of jarred delights. Jams, chutneys, pickles- it's like a condiment circus back there. Yum I thought, I do fancy me some condiments on a sandwich. So I paid my £3.50 for my picalilli and made myself a ham and cheese sandwich for old times sake.

Five days later the jar was empty. I am now on my second jar.

It's not English mustard spicy like the other versions I've had. It's much more a sweet and sour style of relish with good chunks of veg for a slight crunch. There's a sharp vinegar tang which is what I think I love the most. I've put it in sandwiches, on top of cheese and crackers, and licked the odd spoon clean. Surely there must be other things I can spoon it over...

Thursday, February 10, 2011

The Plight of the Single Diner

In the first of my 'making up' posts, here's a little something I wrote last year on a tasty lunch date with myself.

This is the time of year that I end up on my own most weekends. The boy has his annual audit so I get some 'me' time whether I want it or not. Many times I love it since I get time girlie primping and watching lame tv but there are some things I don't do on my own. Movies and public dining.

This weekend though dining alone was a good thing as I wanted to hit an exhibition at the British Museum. It also meant I would need to feed myself since I wouldn't make it back home with no lunch in my belly. One of the reasons I generally don't like to ask for a table for one is that it means that this one is doing the paying. But I consoled myself with the thought of going to Abeno near the museum that I'd meant to eat at for ages that I knew wouldn't be on the boy's list of must tries.

So I looked around to see if anyone saw this loner going in and when the coast was clear I held up one finger and squeaked out the three words I thought would never pass my lips- table for one. I have to start by saying that I almost walked out after 15 minutes. I was sat by the door so even though I was constantly being passed by the wait staff it took 15 minutes to get a menu an another ten to get my order taken. I was on the verge of bolting but pregnancy hunger and having to walk to somewhere else compelled me to stay and wait it out. Hell what else was I going to do go home and watch Wipeout USA (which I'm not afraid to admit a liking to)?

Abeno is not what we expect of Japanese restaurants. They specialise in okonomiyaki. Basically it's an omelette. But a crazy ass Japanese one at that. They do noodles and a few other options but if you come here it's for the okonomiyaki. Being a table of one I couldn't go crazy and order
lots of things to taste and with an increasingly loud growl in my stomach I needed to chow down now.

I love dumplings in just about any format so I had to go for the tofu and avocado gyoza as the combo was intriguing. This gyoza on the menu was fried rather than the usual griddled. Four pieces arrived with a few salad greens and the usual gyoza sipping sauce. I wondered how the
mix of avo and tofu would be in general and how frying would affect the taste and texture. The outside was a perfectly golden fried parcel of crunchy fun. Inside were tiny diced pieces of tofu and avocado obviously warm from the frying but they held their shape. While I couldn't really taste the tofu (can you ever really when it's plain?) I found it a bit nursery like. This is a compliment. The taste took me back to my childhood love of avocado heated in a flour tortilla. It
was creamy with a nice salty hit from the dipping sauce. Needless to say I was so hungry that I couldn't pause to take a photo.

Picking a main ingredient for my okonomiyaki from the list was tough but I've been having kimchi cravings so the moment my eyes glanced down the menu and saw pork and kimchi there was no other option. (On a side note why do some Japanese restaurants put kimchi on the menu and some don't? I know that kimchi is Korean but some Japanese places I go to put it on the menu which is good times but the ones that don't get pissed if you ask for it. Last weekend I was ill and the boy went to our local Japanese robata place and I said to him if you see kimchi on the menu get me some. So when he didn't see it, and aiming to make a sickly pregnant wife happy, he asked if they had kimchi and was treated to a snappy "this is Japanese restaurant NOT Korean". By the number of Japanese restaurants that I've seem kimchi on the menu I'd hazard a guess and say the Japanese must have a penchant for the stuff but why get mad if you ask for it? Ok rant over.)

So once the waiter realised the speed in which the gyoza disappeared off my plate, he rocked up with a tray that looked to be the start of my lunch. The plate had several strips of what I at first thought was bacon but remembered that I hadn't given in to the bacon option so it was most likely thinly sliced pork belly. Then there was the mystery bowl.

In it lie the makings of my funky omelette. As the waiter stirred it into a frenzy I could make out the cabbage, the wet- which was eggs, the kimchi was evident by that pink red hue you get with traditional kimchi, beyond that it looked like a lot of mush in a bowl. Once waiter was happy with the mix, he drizzled just a touch of oil on the griddle built into the middle of my table. The mush was poured onto it and shaped into a round flatish mound; this was followed by my bacony pork belly bits being flash grilled and then placed on top of my mound o' mush. Then a dome cover was placed on top and I waited for the magic to happen. A few minutes later he came back, raised the cover, flipped it over and covered it back up. The next time he returned he came bearing gifts in the shape of condiments. It was as if he knew me.

I am a self confessed condi-mental. With my pork and kimchee combo he recommended soy sauce and chili but I could also choose from Mayo, BBQ, seaweed and bonito flakes. So I said yes. To all of it. Make mine a 50/50 then.

I have to say that I loved it. It was fluffy, not too heavy, with the odd chunk of crunchy spicy kimchee and the odd bit of pork. In the next bite the taste would be more eggy or cabbagey or with a crunch of tempura bits. The soy and chili really worked and while I preferred it but for sheer gluttony go whole hog and get the Mayo and BBQ option.

Once I'd decided that as I was ignored at the beginning I was going to eat slower than usual and I'd worked my way through my meal, I was sure that I didn't want dessert. But I always love to look at the options and got suckered into the homemade matcha green tea ice cream. I love ice cream and if I see the words home and made than there is no other choice in my book. I'm rarely bowled over matcha flavoured sweets but boy was I surprised. My scoop of it arrived with a side spoonful of sweet red adzuki beans which usually just remind me of odd sweet frijoles but I ate them hoping that it had some sort of nutritional value being a bean and all. The ice cream however was delicious. Creamy but not too rich, sweet but with a slightly savoury balance from the green tea. Tops.

So the damage for three courses with a juice- £20.90. Which for a long leisurely lunch that filled me up on a cold day without wanting to send me straight for a nap, was not too bad. So my verdict on lunch at Abeno- lunch for one at Abeno can be done with a portion size that is enough for the single diner. It was tasty but the downside is that you will be so tempted to order a lot because the options are numerous. I've been back as a table for two and sharing the fun of table grilling made the meal more enjoyable and less gluttonous. But whether I go alone or as a plus one, I will be back.

Maple Bar None!

I loves me some donuts. A nice glass of ice cold milk or strong black coffee and a maple bar. That oh so healthy sugar high that makes you so hyper that you spout utter nonsense that only another person in the same state can comprehend. It's the sort of thing that if you've ever had to keep a food diary you omit lest the wrath of the nutritionist fall upon you. But deep down you smile because it was moment of bliss. I don't do donuts often but when I do it's always the same. Maple Bar (but I've been known to dabble in the realm of the apple fritter from time to time). But if I'm going to send my blood sugar sky high I want a great donut. Not too greasy, not too sugary (like the Krispy Kreme version that has the glaze with a sort of maple smock on top). It needs the right balance of dough to maple glaze.

Since I have yet to find such a specimen in London- and I've looked for ten years- when I went to Portland, Oregon to see my sister I was determined to indulge. She wanted to go to Voodoo Donuts for a Maple Bacon Bar. It sounded disgusting but found it ok. If you love salty sweet combos then it's king. But I'm a purist when it comes to my donuts. Traditional reigns supreme. A good raised yeast dough plus a not too thick layer of maple glaze equals perfection. I happened to stumble across an article on donuts in Portland that rated the maple bar at Annie's Donuts tops.

I had to go. Stat.

It's a totally unassuming donut shop that if you didn't know better you might pass by. As soon as you walk it the sweet sweet smell of donuts high fives your face. I placed my order and sat down.

Oh. My. Goodness. D-I-V-I-N-E. It was just what I missed about donuts. Fluffy soft dough. The perfect amount of glaze that had the sort glossy sheen to it that's normally reserved for shampoo ads. I think I actually cried a tear of joy. I had to stop myself from eating a third one it was that good. So the moral of the story? When in Portland get thee to Annie's. And eat a second maple bar for me.
Annie's Donuts, 3449 Northeast 72nd Avenue, Portland, OR 97213-5817
Telephone - (503) 284-2752

P.S. If anyone has scouted other top donut shops, please pass the details along.

Saturday, January 30, 2010

Where in the world is Xochitlcooks?

Yes it really is me. It's been a while yes, but I swear I didn't forget about you little blog. Life and work and all that other stuff just got in the way. All the time. Seriously. Ok so maybe two years is a bit much but the last year especially was such a whirlwind of a year that I am constantly amazed by where the time went.

Although I wasn't writing, I was still definitely into food. My love of cooking and baking never waned but there has been a big phase of going out. There was the angel on one shoulder saying "You know, you really should be making notes on this. It would be a great post.". While the little devil on the other side whispered, "If you pick up a pen, you'll miss out on that last tasty morsel of dessert because The Boy will swoop in there and take it." Needless to say, that little devil won a lot of those battles. Especially when I was a ravenous eight months pregnant woman. No one was going to get between me and delicious goodness.

So that was one recent distraction that has taken up the last year. The Boy and I became three. Mr D (as I refer to him has) made his long awaited appearance last summer and is definitely a handful. But what culinary adventures have I had over the last two years? What's managed to keep me away from you? There has been some travelling. Portland, San Francisco, Barcelona, San Sebastien,the South of France- all filled with fantastic eats that I will try my hardest to remember the fine details of to pass along.

More recently though, cooking has become fun again. I have managed to start a new year with some time on my hands (a baby is not so much time on my hands but it is thanks to the joys of maternity leave) and hungry friends to feed. Although I went on hiatus, the ideas never stopped and the food memories I wanted to share never ceased. As I embark on this new balancing act in my life, the importance of making and sharing good food with those I love is reinforced. So, in a medium sized nutshell, there you have it.

It wasn't a break up. It was just a trial separation. It wasn't you; it was me. But boy did I miss you and I'm going to try to make it up to you.

Tuesday, April 29, 2008

Egg McXochitl

As I slowly inch my way back into the kitchen after a four month hiatus (seriously- my kitchen has never been so clean) and slowly get my life back, you know the one that involves me cooking and writing about it, a long scheduled dinner with Johanna, Jeanne and Jenni offered me an easy way back in the guise of this month's Waiter, there's something in my...Breakfast.

I'm more a brunch person rather than a breakfast person so whenever I go back to San Diego I hit my favourite brunch spot, Parkhouse Eatery, at least twice a visit. I have blogged about pancakes in the past but wanted to do something different (and relatively easy). Something I use to keep any visiting kidlets and husbands happy. Plus it's great for those sorts of hangovers where you want a 'dirty' meal to soothe the self-inflicted pain, the kind of food from places that you know you shouldn't really eat at but in a weary state they seem like a good idea. This is my version of a certain breakfast sandwich you get from a certain red haired, big shoed frontman for a fast food joint but it's more chic, more polished and a hell of a lot tastier.

You can tailor it how ever you want. This time I poshed it up a bit and used Manchego and Jamon Serrano; in the past bacon, cheddar and the odd slice of processed cheese have made an appearance. So the easiest way to describe this post is to say that I've set up the basics and it's yours for the taking.

Enjoy.

Egg plus whatever Breakfast Sandwich

Makes 1 sandwich

Ingredients:
1 egg
1 muffin (English muffin in the States), split
2 slices of jamon serrano, cooked in a frying pan to crisp it up
1 slice of cheese, optional

Equipment:
1 cooking ring (the kind used for that pro chef touch or, if like me, you need to cut out scones)

Heat a nonstick frying pan over medium heat.

Grease the cooking ring with butter. Put the cooking ring in the pan and crack the egg into the ring; prick the yolk. Turn the heat down low. You should see the egg white changing colour.

While the egg cooks, put the muffin in the toaster and toast to your preferred taste.

When the egg is nearly white, turn the ring over to cook it on the other side. The ring will be hot so be careful when flipping it over. Because the rings I have are deep, I find it easiest to use a spatula and a pair of tongs to flip it over. Once flipped over, if the egg sticks, run a knife along the edge to unstick it.

Remove the ring and cook another minute more.

If using cheese, place on the egg to gently melt it. The jamon serrano/ other meat product can be reheated in the pan as well.

Place the egg on the bottom half of the muffin. Top with the bacon and the other muffin half.

Tuesday, December 18, 2007

Menu for Hope 2007

Around this time of year, every year, while most of us (myself included) are busy thinking about our Christmas shopping lists, Pim of Chez Pim reigns over the fundraising raffle that is Menu for Hope. 2007 marks for fourth year that food bloggers (and others) the world over donate items for an online raffle. Most of the gifts are food related but the odd non foodie gift makes it's way in. However, this isn;t a raffle just for the sake of it. Money spent on tickets goes to the World Food Programme (WFP); last year's raffle raised over $60,000 for the WFP. This year we've been allowed to earmark the money for a specific programme, a school feeding program in Lesotho.

Lesotho has one of the highest rates of HIV/AIDS in the world and the U.N. describes 40% of the population as 'ultra poor' and cannot afford basic supplies. The country has had its worst drought in nearly 30 years and the WFP estimates that 410,00- out of a population of only 1.9 million- will face basic food shortages. It is estimated that malnutrition in Lesotho claim the lives of one in 12 children before they reach the age of five. 56% of the population live on less then $2 per day. The school feeding programme provides a nutritious meal to almost 150,000 children every day.

This year, children from Lesotho schools will be photo-blogging alongside us and bringing their stories to an international audience.

So, why am I bringing this up on my blog? Well in addition to wanting to support a good cause, Johanna and Jeanne (the UK hosts) have asked me to participate. I had wanted to take part last year but was about to go on holiday so I jumped at the chance to do some good during the season of giving.

I've teamed up with my buddy Clare (formerly of Lemon Soul but I'm working on bringing her back!) to bring a couple of prizes to the fold that you will want to purchase a raffle ticket for.

Behind door number one-
A Taste of Mexico - Bring out your inner Mexican with this spicy little care package. This will bring a smile to anyone missing home or that lovely holiday you had in Mexico. It included a selection of Mexican treats from my personal box of Mexican tricks that I replenish when I go home. Included in this package are a collection of dried chiles, dried Mexican Oregano, a tin of tomatillos (great for salsa), a tin of chipotle peppers (so many uses, so little time), some El Pato sauce (a back up enchilada sauce in many a home) and I will also throw in half a dozen corn tortillas (the real deal- I don't share these with just anyone!) plus to drink you get Abuelita hot chocolate and dried hibiscus flower used to make the drink Jamaica. Suggestion recipes for all the ingredients will be included too. This prize is for the UK and Europe only.

And behind door number two-
Tea for Two - Are you a homesick Brit? Do you miss Marmite on toast or a cup of proper tea and a good ol' Chocolate Hob Nob? Then this is for you. Clare and I have started a collection of a few British favourites and we will give you another £20 to spend in the shops so you can add HP sauce, Colman's english mustard or a few bars of Dairy Milk t(or Sherbert Dib Dab to take you back) to the shopping list that YOU give us. Please bear in mind that they need to be items that we can legally ship into your country and please remember that we will also have to cover the cost of shipping so not too many glass bottles!

Hopefully this little treasure trove of delights has whetted your appetite and made you eager to buy a raffle ticket. The ticket office CLOSES on DEC 21st. A link for all the prizes and to the donating site is here.

Remember that this is for a good cause, the $10 you spend will go to feed a child. And don't forget- your giving may well get you some receiving!

If you have any questions, leave a note and I will get back to you as soon as I can.

Happy Holidays!

Xochitl xx

Sunday, December 16, 2007

My new obsession-smoked oatcakes

Yesterday I nipped into my local Waitrose to pick up a few bits to get myself through yet another Post-Christmas party hangover (this one had the best food yet so it was well worth it). One of the hosts is Irish and on our cheese plate was a wedge of Cashel Blue- an Irish blue cheese. I had seen it in the shops before but I'm so enamoured with French blues that I get sidetracked and forgo most British blue cheeses. The exception being glorious Stilton that each Christmas I sneak a wedge from Neal's Yard to my Father-in-law who is barred from having in the fridge. His eyes light up when we sneak into a corner, drinks in hand to devour it without getting caught.

So after completely enjoying the Cashel Blue, I was having withdrawals and went to buy some and nipped down the cracker aisle to get some Carr's Water Biscuits when something caught my eye. Ditty's Irish Smoked Oatcakes. So I gave them a try and now I'm hooked. The package says it's 'handmade with rolled oats from County Armagh and smoked by Frank Hederman at the Belvelly Smoke House, County Cork.' The oatcake triangles are thicker that other ones on the market and at the initial bite are slightly sweeter that other ones I've had. You get a soft hit of smoke at the start but it's the after taste where you get the deeper hit of smokiness.

It went well with my Cashel Blue (I have yet to try it with a slice of cheddar) as it adds another dimension to your plain ol' cheese and biscuits and I find myself eating them plain too. If you see it at a shop near you- try it.

Friday, November 02, 2007

Summer of Food Part 1

The summer, by which I mean the summer months as there was a distinct lack of sun here this summer, has flown by. A lot of my summer has been spent eating my way round London, Europe and California. So in place of a post with a recipe, I'll summarise my summer adventures and recommendations if you plan on hitting any of these places soon.

While on a long weekend in Italy on Lake Garda, we took a ferry ride to a quaint town on the southern half of the lake called Salo. We got there just as places we shutting up after lunch but we managed to find one little place that was still open. I didn't have a notepad on my so I can't remember exactly what we had but I do remember fantastic pasta with duck ragu that The Boy had and while I had a perfect rack of lamb.

Osteria dell' Orologio, Via Butturini 26/A, 25087 Salo, Italy
Tel: (+39) 0365 290158

In need of sun, we headed off to France. Not in the mood to deal with airports, we decided to road trip it down to the Languedoc region. Yes it is a long drive but we broke it up. It is a beautiful drive as you start to realise how diverse the French countryside is with it's changing scenery from the North to the South. The first rest stop was in the town of Tournus in Burgundy which lies along the river Saone. I found a reasonably priced (60-70 euros a night) basic hotel through Logis de France. It was a French friend who suggested the site and explained it as decent, reasonably priced hotels where you'll be able to get a good meal. We stayed at Aux Terrasses which had an adequate room and the kind of restaurant where you wonder if it will be good but when you realise that it's full of more locals than hotel guests you know you're in good hands. It was traditional French fare with flourishes of haute cuisine. Let's just say that the restaurant bill was twice the price of our room but we ate well, were able to linger and drink some fab Burgundy wines by the half bottle.

Aux Terrasses, 18 Avenue du 23 janvier, 71700 Tournus, France
Tel: (+33) 03 85 51 01 74

The next pitstop was Villneuve-les-Beziers, a small town of 3000, in Languedoc. When I mentioned to Johanna (aka The Passionate Cook) that I was going to that region, she immediately gave me a recommendation of a place to stay. She was adamant that at the very least we had to go for a meal. All I can say is THANK YOU JOHANNA! We loved La Chamberte. When you pull up, you don't really know what to expect. Once you get inside, the first sight is a courtyard garden with a couple of loungers and the odd cat lounging in the sun.

A converted wine storehouse, you walk into a large dining room and realise that they mean business when it comes to eating as the place only sleeps ten. Before I wax lyrical about the food, I should cover the rooms. Ours was a generous sized (comfy) double bed, there was air-conditioning (divine when it's 35-40C heat). It's the kind of place to head for when you need to get away from it all- the only TV is tucked away int he communal living room up stairs so there's no distractions and you can read peacefully in the sun for hours or you can pet one of the three cats that rule over the joint (or you can go for stroll to the Canal du Midi and hire a boat and cruise up and down).

I was excited to learn that it was a one menu kinda place. I had forgotten where I was and that it was a Friday when the lovely waiter told us what was on the menu. Fish, fish and fish. The Boy was happy as Larry but as someone who's not super keen on fish, I was gutted (no pun intended). As there was really nothing else in the kitchen, when in Rome and all that, I gave in. Starter was home cured salmon and blinis faites maison (homemade blinis) served with peppered creme fraiche and a simple green salad. The salmon wasn't too fishy, with an almost hammy, meaty texture. The saltiness was well balanced by the creme fraiche and the salad. The main dish was a fish tagine- a white fish (I can't remember what it was) served with couscous (they were large and reminded me almost of farro or barley). There was a choice of equally delicious desserts. Plus you've got to love a place that if you can't decide if you want red or white, you'll more than likely be given a bottle of each. Bruno, one of the owners, goes table to table halfway through the meal to make sure that everything is ok and to chat.

We loved it so much that we went back for dinner another night as it was near the house we rented (you don't have to be staying there to eat in the restaurant). Bruno and the waiter remembered us and greeted us as if we were regulars and sat us at our same table on the terrace. We're trying to figure out when we can go back for a weekend getaway.

La Chamberte, Rue de la source, 34420 Villeneuve-les-Beziers, France
Tel: (+33) 04 67 39 84 83

More on France, California and London to follow.

Tuesday, July 10, 2007

The best biscuits in the world? Quite possibly yes.

It was The Boy's birthday and keeping with the tradition of "I book, he buys" (he doesn't have the patience to wait on hold after a dozen calls, whereas I am more inclined to do just about anything to not have to buy my dinner when the choice is between me or him to pay), I scored a table at one of our favourite restaurants, Locanda Locatelli.

Ever since our first meal there, I have been obsessed with the amaretti biscuits that are served with coffee. When I say obsessed I don't mean in a "Mmm that was tasty maybe I'll have them again one day", I mean in a "I rushed home looked up the recipe in the Made in Italy cookbook and when I rang up before my next reservation asked if I could buy some" kind of way (The restaurant very kindly had prewrapped some and brought them out when we left. Needless to say we got some confused looks from people.). I majorly crave them. Part of the obsession came from not being able to find apricot kernels that the recipe calls for- I was determined to find these damn things! Lots of phoning around proved fruitless- no one sold the kernels. I could buy them on the internet but how would I know if they were the right ones since I hadn't the slightest idea what an apricot kernel looks, smells or tastes like.

Me and The Boy's next trip there came and who should be sat next to me but Mrs. Locatelli. That got me thinking. If she was here, where was he? A few minutes later, dressed in his whites was the main man. I (quietly) squealed like a teenage girl. Fortunately, The Boy shared my glee as it meant that perhaps Mr. Locatelli himself has shaved the truffle on his gnocchi (that's what the Italians call it but he and I refer to them as "Pillows of Happiness"). I kept one eye on him all night (the other was glued to every morsel that I ate). All night The Boy ribbed me asking if I was going to ask about the apricot kernels. I hemmed and hawed, did I have the guts to go up and start chatting to him? I'm not usually a star f*cker- I never wander up to celebs and ask for an autograph. It's not my style (although Sven and Nancy Dell Olio were there that night and I really wanted to tell her that she's much prettier in real life and looks nothing like a drag queen).

Another meal came to an end and we decided to have a nightcap. A couple of Bellinis later, I sauntered the two steps to the bar and asked if he could answer a question for me. Looking a bit bemused he said ok. I launched into the amaretti biscuit dilemma. I think he finally realised that I wasn't a stalker. He offered to give me some kernels and I replied that it wasn't necessary, all I wanted to know was where do I get these things.

After a twenty minute discussion on the virtues of said biscuits, he said he would get me a few so I knew what to look for. I nearly shed tears of joys when, the next day while determined to make my own, I realised that he sent me home with the exact amount needed to follow the recipe in the cookbook.

He is a very lovely man that Mr. Locatelli.

P.S. A few extra notes. A) My batch were nearly as perfect. B) He suggested going to Middle Eastern grocers to get the kernels. C) He said that you could still make them without the apricot kernels but they do add that little extra something.

Amaretti Biscuits
from Made In Italy

Makes about 35 amaretti

Ingredients:

25g roasted hazelnuts
125g blanched almonds
100g apricot kernels
500g caster sugar
120g egg whites
icing sugar for dusting

Crush the nuts and apricot kernels finely in a food processor. Add the sugar and egg whites and process until the mixture all comes together. Spoon the mixture into a piping bag

Line 1 or 2 baking trays with waxed paper and pipe the mixture into rounds on them, spacing them out well. Dust liberally with icing sugar. Leave for 12 hours so that the mixture can dry out slightly. After this time, they will have formed a 'skin'. Pinch the biscuits lightly with the fingers to break this and give a knobbly appearance.

A good half hour or so before you are ready to bake the biscuits, preheat the oven to 180C, gas 4, then bake them for 11 minutes until light golden.

Monday, July 02, 2007

Cheat's Ravioli

The challenge: Dumplings for Waiter there's something in my...
The format: Something made of dough and filled
The methodology: Baked, boiled, steamed, poached but not fried
The possibilities: endless

What to make, what to make?!

There are just too many choices. Dumpling are something I love. I planned on making some Chinese dumplings (which I can eat any time of day)- something along the lines of my beloved Chili Pork Dumplings from Royal China. They have that slightly gummy dumpling dough with a garlicky pork filling with a spicy soy sauce. I mop up every last bit of the sauce with anything I can find. I get mass cravings for the little buggers.

Or should I do gyoza with a chicken and chive filling? Same dough, but with one lightly grilled crunchy side with the other with that lovely dough. Something as tasty as the gyoza I order too often from Ramen Seto in Soho. Or what about making Char Sui Bao- Chinese BBQ pork surrounded by pillowy white dough?

After a week of using Waiter there's something in my... as my excuse to live on Asian style dumplings (and telling Johanna, this month's host that I was making Chinese dumplings) I decided against it.

The other thing I have craved like a fiend lately is filled pasta. Usually I have a love hate relationship- I either never want pasta (The Boy's favourite thing in the world) or I cannot get enough of it. Yesterday was one of those days.

I still had some Chinese fresh dumpling pasta in the fridge and I'd heard that you can use it as a quick dough for ravioli (but I have also thought that it seemed a bit dubious an notion). With a few ingredients stashed in the fridge, it was surprisingly quick and easier and while it's not Locatelli pasta, it still felt good to half make something from scratch. It's easy enough to experiment and change the filling around to something that tempts or to decrease or increase the filling quantity. Mine has an artichoke and sundried tomato filling but get creative and see what works for you. Make some sauce if you like or simply brown some butter and drizzle a little on top.

Cheat's Ravioli

Makes 18+ ravioli

Ingredients:

1 packet fresh Chinese dumpling pasta- the round shaped pieces
150 g fresh ricotta
3 grilled artichoke hearts (the kind in oil found at the deli counter), roughly chopped
A few olives, roughly chopped
A few sundried tomatoes, roughly chopped
20 g Grana Padano cheese, finely grated

Equipment:
small bowl of water
fork

Put a pot of water onto boil while you make the ravioli.

Place the artichokes, olives and sundried tomatoes in a food processor and blitz to a coarse paste.

In a bowl, place the ricotta and fluff with a fork. Fold in the artichoke paste and season to taste.

Place one piece of pasta on a cutting board and place a teaspoon of filling in the center.


Wet one finger in the bowl of water a lightly wet one half of the pasta (but don't wet the filling).

Fold the dry half over and line the edges up. Press the two halves together, pressing the dough around the filling so that any air gets pushed out.


Using the tines of a fork, press against the edge of the pasta to seal the ravioli and will also make it look nice.


Continue the process with the remaining pasta sheets.


Once finished, place them in a pot of boiling water and cook until the float to the top- about 3-4 minutes.

Drain and serve however you like.

If you want to see what others deemed dumpling worthy, click here.

Sunday, May 27, 2007

A salad to see in spring (even if it's actually wet and gloomy outside)

Before I start I need to apologise for my long, long absence. Some of you that know me away from this blog will know that I have had a rather difficult start to the year and needed some time to withdraw into my shell. I'll save you all from the miserable details but needless to say, for once in my life, solace wasn't found in the kitchen. In fact I stayed further away than I ever have. However in the last few weeks I have slowly tiptoed back in the kitchen making an omelette here, raspberry fool there and finally going the whole hog. Or rather whole leg of lamb for a dinner for eight. And I loved it. The next day I passed hours catching up on food mags and cookbooks that had collected a light layer of dust. But I'm nearly back to my old self and it feels good. It's where I want to be. So sorry to those of you missing your fill of Xochitlcooks. But I'm back and I plan to make up for lost time. On that note...

Oh yes another wet, grey Bank Holiday weekend. I shouldn't have expected anything other than that but after a few days of London sunshine and a sunny, hot, long weekend in Italy my blood was warmed and ready for summer. I had to settle for a salad to remind me of clear skies instead. I can't complain though since it was lovely and fresh and took a whole 10 minutes to make. Sometimes I think I can trick myself into believing the weather is nicer by wearing shorts and a vest in the house while eating summer fare. Occasionally it works, try it. I highly recommend having a BBQ in February- sure one unlikely sod has to bundle up in his normal winter clothes but the rest of you can make believe it's summer when you tuck into burgers fresh from the grill.

Anyway, enjoy the salad.

Broad Bean, Mozzarella and Rocket Salad

Serves 1 (but add more to feed a crew)

Broad beans, 1-2 handfuls*
Rocket, 1-2 handfuls
Fresh bocconcino (small ball size) mozzarella, 3 , quartered
Olives (black or green), a few to garnish
Fresh mint, small handful of leaves cut into ribbons
Prosciutto, 3 slices
Olive oil

Place the slices of prosciutto on a piece of foil on a baking tray under the oven grill until crisp on both sides which should take about five minutes.

While the prosciutto is cooking, get the salad ready.

On a plate, place the rocket, broad beans and mozzarella. Sprinkle the mint on top. Drizzle with a little olive oil. Add the olives and prosciutto.

Enjoy.

*A note on broad beans-
Ever since The Boy had these in the mac and cheese at Fog City Diner in San Francisco, these have become a favourite veg in our house. One reason I like them is that I like the idea of working for my supper. Their pods that you have to break into to free them from their furry little cocoons. The key to broad beans is to remove the outer layer of the bean. The milky green outer layer makes the bean taste a little tough. Remove it and you get the best bit.

The easiest way to peel off the outer layer is to blanch them for one minute in boiling water. Rinse them under cold water and when cool enough to handle, sit in front of the TV and peel away (using your nails or a paring knife to cut through the layer if they don't pop out). I give them one last rinse once peeled to wash off and residue. Eat cold in a salad, toss into a pasta, add to a frittata.

Sunday, March 11, 2007

Zucchini Nut Bread...

Or, How to confuse people with courgettes.

With the sun out this weekend I was finally starting to feel like spring could actually be on its way. This means one thing- SPRING CLEAN! I always start with the best intentions but have a short attention span and wind up doing a Winter Clean or an Autumn Clean rather than having my clear out when everyone else does. I sometimes think I'm a bit of a freak because of that but The Boy reminds me that when it is springtime proper, it's much more enjoyable to be out of doors rather than inside dusting lampshades. Fair point.

So I figured I should get cracking now and see what needs using in the kitchen before I start spending my Sunday afternoons sipping glasses of Rose at my local. Flours, spices, nuts- check. In the fridge there were eggs, sour cream, and courgettes that I'd bought with the intention of adding to a pasta but never got round to (mainly because every time I mentioned that as a dinner option to The Boy I was met with a look that screamed, "Are you serious?").

After a look through some cookbooks I settled on Zucchini Bread. While it's not unheard of in the States, and sells alongside Banana Nut Bread in shops, in the UK it gets me more of the "Are you serious?" looks. The last time I made some and took it into work it remained untouched on the treats table before I made a bet with someone. Within ten minutes it was gone and people didn't believe that it had courgettes.

I forgot which recipe I used last time so settled on one from a fundraising cookbook my mother bought when I was in school. Ultimately the recipe was more of an inspiration as I was missing items and had to improvise and created an entirely new recipe that is exactly like that loaf that I wanted to make.

Don't let the idea of courgettes confuse you- this isn't a savoury bread. It isn't as sweet as some I have tasted but it goes well with an afternoon cuppa and is easy, one bowl baked goods to make. You could frost this if you wanted it to be more cake-like (some sort of cream cheese frosting would be tasty) but I prefer it plain and simple.

Zucchini Nut Bread
Makes two loaves

Ingredients:
2 1/4 c. cake flour (the original recipe calls for plain flour- this is what I happen to have)
2 tsp. baking soda
1 tsp. salt
1 1/2 c. sugar
2 pinches of nutmeg
1/2 c. sour cream
1 c. olive oil (use one that is like in flavour)
4 eggs
2 courgettes (zucchinis), coarsely grated (you need about 2 cups worth)
1 c. walnuts, roughly chopped
1/4 c (or a couple of good size handfuls) dark chocolate, roughly chopped

Preheat oven to 175C.

Mix the flour, baking soda, salt, sugar, nutmeg, sour cream, oil, eggs and courgettes either by hand or in a stand mixer.

Add the nuts.

Stir in the chocolate by hand.

Pour into two greased and/or lined loaf tins.

Bake for about 45-50 minutes. Leave to cool for about 10 minutes and then remove from tin and finish cooling on a rack.

Wednesday, March 07, 2007

Reggae Reggae Sauce

Ahhh, the power of television. Every now and then you get suckered in by the power of persuasion. A few weeks ago The Boy was watching Dragon's Den when, in a change from the usual cats that pitch ideas for cash, in walks a guitar playing rastafarian. If I remember correctly he was singing, "Put some music in your mouth. It tastes so nice we had to name it twice... hot reggae reggae sauce." Needless to say he won the panel and the public over. If you turned on the radio you'd hear him signing a cheesy jingle that always managed to stick in your head. Always a pushover for a product with a built in theme song, I noticed Reggae Reggae Sauce when I popped into Sainsbury's earlier today (it was also launch day I learned when I turned on the Ten O'Clock news).

Out came the stovetop grill. On went the chicken breasts.

The verdict? It has a sweeter, smokier flavour than I expected. It does have a slight kick from the scotch bonnet peppers but I wonder if it's been toned down to appeal to a wider audience. What I was hoping for was the kick in the ass I get from the sauce on the Jerk Chicken Wings at Mr. Jerk (now known as Jerk City- but it will always be Mr. Jerk in my heart). The label says Jerk/BBQ sauce and it's just that. Would I get it again? Sure. I would pick it over every other nasty commercially produced sugary sweet BBQ sauce that it sits on the shelf with if I need a quick marinade for a barbecue. I hope the product sells well since Levi Roots seems like a genuine, likeable guy who's happy to be bottling his grandma's recipe.

My plan for the rest of my bottle? BBQ ribs. I can't wait.

Tuesday, February 27, 2007

Waiter, there's something in my...PIE

It's my favourite P word. It makes everything taste better. Saying it puts a smile on your face. Yes dear friends I'm talking about P-I-E. Pie. The thought of it makes my mouth water. So how could I not want to partake in this month's Waiter, there's something in my... event. Deciding to take part was easy, deciding on a pie was a whole other story.

Should it be a sweet pie- apple pie, cherry pie, strawberry-rhubarb pie? Or something savoury- steak and ale pie, fish pie? After hemming and hawing, I remembered a recipe I'd been wanting to try in Gordon Ramsay's Secrets cookbook- Claridges chicken pie. I had thought about it for ages but stayed away as it seemed an rich and extravagant pie. In the end I decided that if I halved the recipe it wouldn't go straight to my hips.

How was it? Lush and creamy and oniony and bacony and chickeny. And yes it was very rich so I recommend serving with some undressed salad greens to cut the heaviness of it. Definitely not a chicken pie for everyday but it would be impressive for a wintery dinner party.

Enjoy.

If you want a full pie round up, click here to see who else had pie in their eye.

Claridges chicken pie
from Gordon Ramsay's Secrets

Serves 4 as a main dish

4 skinless, boneless chicken breasts, about 120 g each
125 g baby onions
500 ml chicken stock (the book gives a recipe for the homemade stuff but for the sake of time I used a stock cube)
1 bay leaf
1 thyme sprig
200 g pancetta or good smoked bacon, in one piece
100 g butter
250 g shemigi mushrooms, or baby button mushrooms
100 ml dry sherry
200 ml double cream
2 tsp chopped tarragon
1 tbsp chopped parsley
250 g puff pastry (again the book gives a recipe but I used store bought)
1 egg yolk, beaten with 1 tsp water
sea salt and freshly ground black pepper

Cut the chicken into 2 cm chunks. Dip the onions in boiling water for 30 seconds to loosen the skins, then remove and peel. Bring the stock to a boil in a shallow pan, add the onions and cook for 5 minutes. Lift out with a slotted spoon.

Add the chicken, bay leaf and thyme to the stock. Return to a gentle simmer and poach for 5 minutes, then take off the heat and leave to cool in the liquid for a minute or two. Strain the stock into a jug, discard the herbs and season the chicken lightly; set aside.

Cut the pancetta in lardons (2 cm strips). Heat a quarter of the butter in a frying pan or wok and stir-fry the pancetta until crispy, about 3 minutes. Remove and drain on kitchen paper. Wipe out the pan.

Melt the remaining butter in the pan. When it starts to foam, add the mushrooms and and stir-fry for about 7 minutes until softened, seasoning to taste.

Pour in the sherry and bubble until well reduced. Return the bacon and onions to the pan and pour in the reserved stock. Bring to the boil and cook until reduced by half. Add the cream and bubble until reduced by a third. Add the chopped herbs and set aside.

Heat the oven to 200C. Roll out the pastry on a lightly floured surface to the thickness of a £1 coin. Cut out four rounds, using a small saucer as a template. Carefully place the pastry rounds on a large non-stick baking sheet and score the surface in a diamond pattern, using the tip of a small sharp knife.


Brush the pastry with the egg yolk glaze and bake for about 10 minutes until risen and golden. Bake for a further 2 minutes with the oven door slightly ajar, to help crisp the pastry. Remove from the oven and slide on to a wire rack.


Meanwhile, add the mushrooms to the sauce and reheat until bubbling (Is it just me or did we not have to remove the mushrooms to start? Was I having a blond moment and missed something?), then add the chicken. As soon as the chicken is warmed through, check the seasoning and divide between warmed serving plates. Top with a pastry round and serve.

Wednesday, January 24, 2007

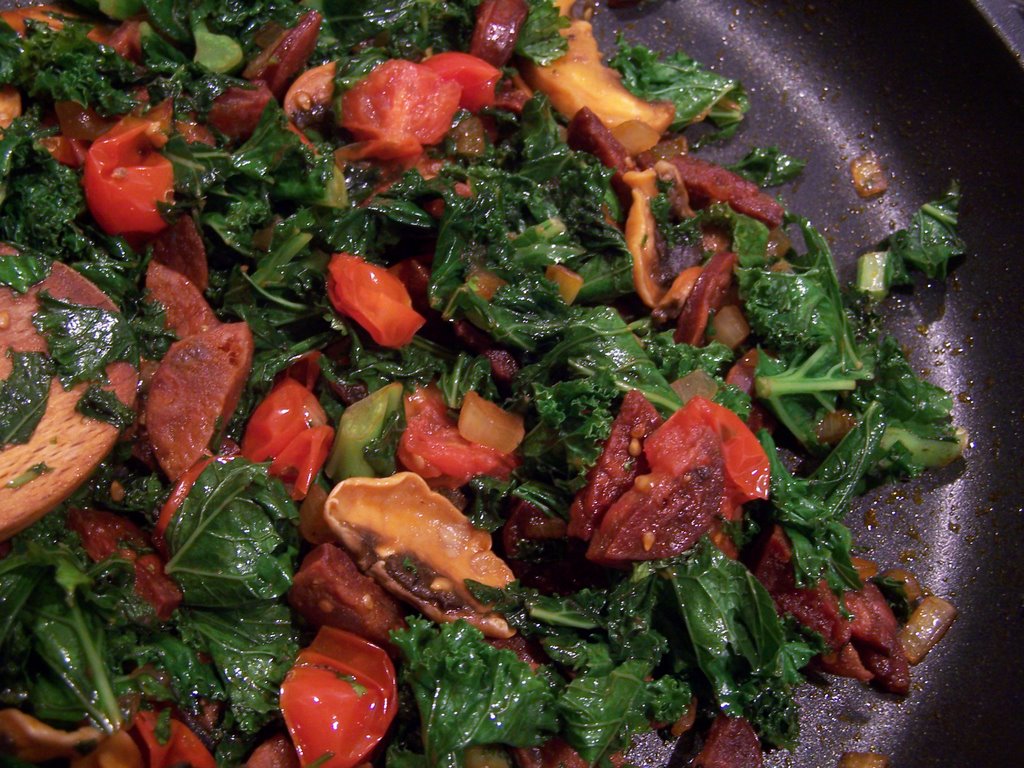
Chorizo and Kale Saute

I really love Spanish chorizo, the dry salami looking version, not the Mexican uncooked sausage meat kind (that makes a mean scramble). In a salad, with eggs or on its own, it is very, very moreish. To feel like I'm eating it with something nutritious, I cooked it up with some greens. It's quick, easy and there really are no measurements. You can adjust it to serve more or less, as a main or as a tapa. Just looking at the photo is making me crave chorizo all over again...

Chorizo and Kale Saute

My measurements are approximate- use what you have available in the quantity you have to hand.

100 g Spanish chorizo, sliced and halved (it can be hot or mild although I prefer it with a kick)
1/2 onion, diced
10 cherry tomatoes, halved (or 1 tomato diced)
3 handfuls of chopped kale (or other dark, leafy green)
1 handful of sliced mushrooms

Heat a frying pan over medium heat. Once hot, add the chorizo and cook a few minutes until the chorizo is browned and has release oil.

Using a slotted spoon or tongs, remove the chorizo and put to one side. Leave the oil in the pan to cook the remaining ingredients (it there is an excessive amount, drain some of it).

Add the onion to the pan and cook until translucent.

Add the kale and cook for a few minutes or until the kale begins to wilt.

Add the mushrooms and tomatoes and cook until softened.

Serve up with pieces of baguette or other crusty bread.


Tuesday, January 16, 2007

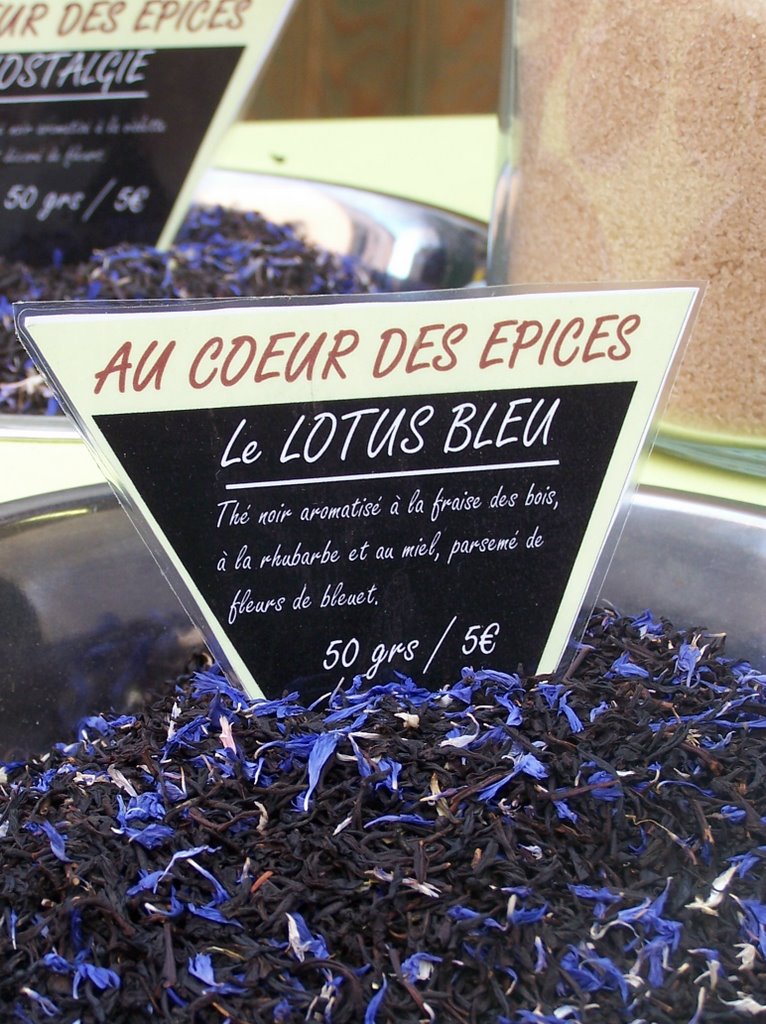
Tea leaves

Au Coeur Des Epices spice stall in Vence, France

Thursday, January 04, 2007

Happy New Year!

Happy New Year to everyone! I swear I have abandoned my blog nor have I forgotten about you. Well if you are nosy like me and are wondering where the hell I've been...here's the last six weeks in a shortish list.

As with many of you no doubt, December was filled with many Christmas parties (which included four in one week at one point), which meant trying to cram four weeks of work into two (with many serious hangovers!), which was followed by a three week break back home in California (during which I managed to fit in a delicious lunch at the Chez Panisse Cafe, make tamales with my father (yes Johanna- I will bring you some when I see you next) and get conned into making Christmas dinner (which entailed making a stuffed and rolled beef roast that seemed to still moo no matter how long it was in the oven).

My immediate return saw me drop of my suitcases which were filled treats from home and have enough time to get back out the door, leaving The Boy at home, to ring in the New Year with a mate at the Kylie concert, which was totally awesome (in spite of my bizarre Mid-Atlantic accent that I've acquired over the years here, I am still a Valley Girl at heart), stumble home for an oh so brief slumber only to wake to be on top form to spend the day with the in-laws, go back to work for a couple of days so I could be inundated with emails and as I write this I am making a mental list of what I need to pack for a wedding I am going to this weekend in the South of France (with a hopefully spectacular dinner at Jacques Maximin).

I woke up jet lagged in the wee hours of this morning longing for a chance to sleep in but knowing that for once jet lag has given me a few hours of solitude to write, I can't complain. Life has been good to me the last few weeks and I intend to enjoy every minute of it before I return to reality, sleep or no sleep.

Xoch

PS- I promise to put fresh photos of my meal at Chez Panisse up soon but I can't seem to find my camera cable! If you are ever in California, the ONLY place to eat a burger is at In-n-Out!

Monday, December 11, 2006

Menu for Hope III


For the third year running, food bloggers from every corner of the world are uniting to fight hunger. This year's worthy cause is the United Nations World Food Programme. So many of us are fortunate to be able to eat what we want, when we want. We have access to the freshest, tastiest and most luxurious ingredients for nearly any dish we crave. Sadly, there are too many people in the world that aren't as lucky.

Fortunately food bloggers aren't doing the chugger (charity mugger) thing and accosting you on the street and following you around until you drop some change in the bucket, instead we are tugging at the heartstrings by auctioning off prizes donated by loads of food bloggers- some you'll know and some you may not. Prizes vary from meals out at some of the best restaurants to personalised city tours to tasty homemade treats.

To donate and get your chance to win a prize, here's what you've got to do:

1. Go to Chez Pim for the prize round up and all the nitty gritty on bidding. You can bid for something from your region or if you fancy something exotic, you can go for something from further afield- the donating bloggers have agreed to ship anywhere (unless specified otherwise or if Customs has a problem with it).

2. Make your donation of at least $10 at http://www.firstgiving.com/menuforhopeIII.

Pim will announce the results on January 15th.

Last year over $17,000 was raised, please help to beat that amount. I plan on be donating my fair share...once I can decide what I want to bid on!

Sunday, December 10, 2006

A taste of home - the final chapter

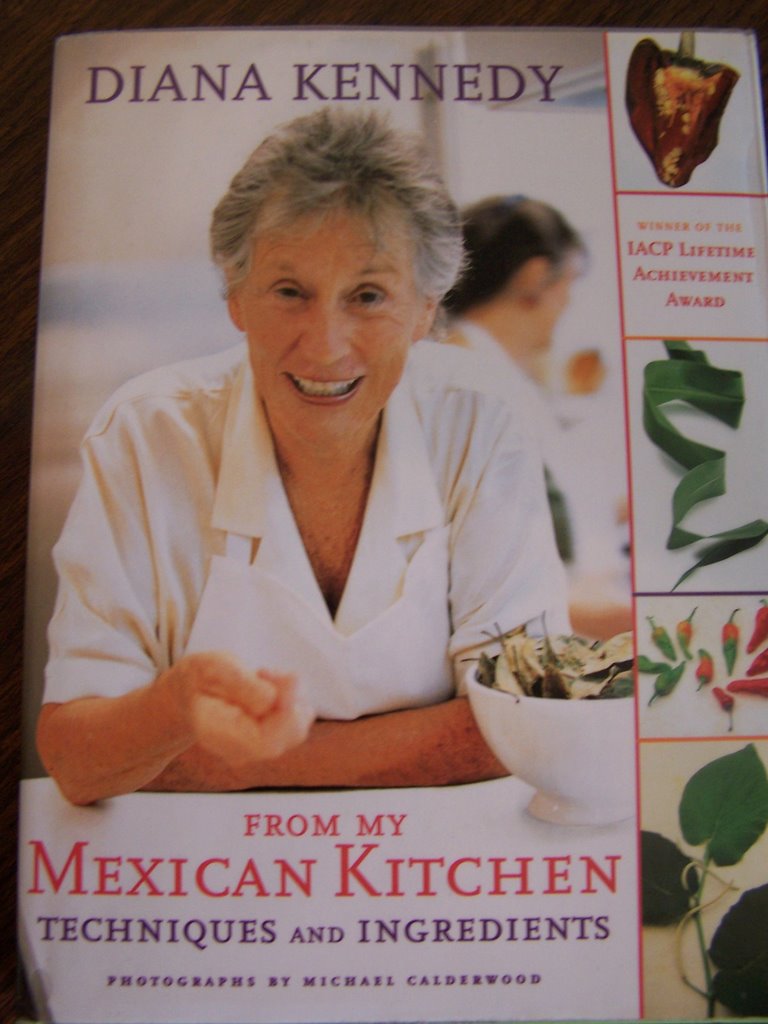
In my quest to learn more about Mexican cooking (beyond the regional style that I grew up with) I asked for a Mexican cookbook as my Christmas present from The Boy's parents last year. I requested something by Diana Kennedy since I'd liked her books when checking them out at the book store. What I unwrapped on the day was not what I had expected but has ultimately proved to be more valuable. Diana Kennedy's From My Mexican Kitchen, Techniques and Ingredients is the perfect reference book for anyone wanting to educate themselves on Mexican cuisine. It's handy when buying dried chiles and understanding the sometimes subtle differences between the varieties. It covers regional differences of particular dishes like tamales- not all are made with corn masa, some are made with a type of wheat flour; not all are wrapped in dried corn husks- fresh husks, banana leaves and corn stalk leaves can be used. There aren't too many recipes in the book but the ones that are, are worth making.

But back to the London Mexican Day...

I have to admit that I had never had Rajas con queso (pronounced ra-hass con kay-so) before. Or if I have, I just never realised it. Poblano chiles are fresh yet have a meatiness to them that makes it very versatile. This dish is rich so if serving as a main, serve a salad alongside to cut the heaviness of it. It works great as a side dish for something like machaca or a simple meat dish.

Rajas con queso (Chile in creamy sauce)

Ingredients:

8 fresh Poblano chiles
100 ml milk
150 g Philadelphia cream cheese
250 g Lancashire Crumbly (or Queso Fresco, if you can get your hands on some)
salt

Preparation:

Clean the chiles and cut into 3 cm strips, removing all membranes and seeds. Either place under the grill until slightly charred or fry in a pan until browning and soft.Use half of them to blend in a liquidizer (ir with a hand-held blender) with the milk and some salt.Heat some oil in a pan and fry this paste to thicken. Add the cream cheese and cook until dissolved.
Add the remaining chile strips, and, as soon as it’s boiling, crumble over the cheese.

(Recipe Jo Wagner)

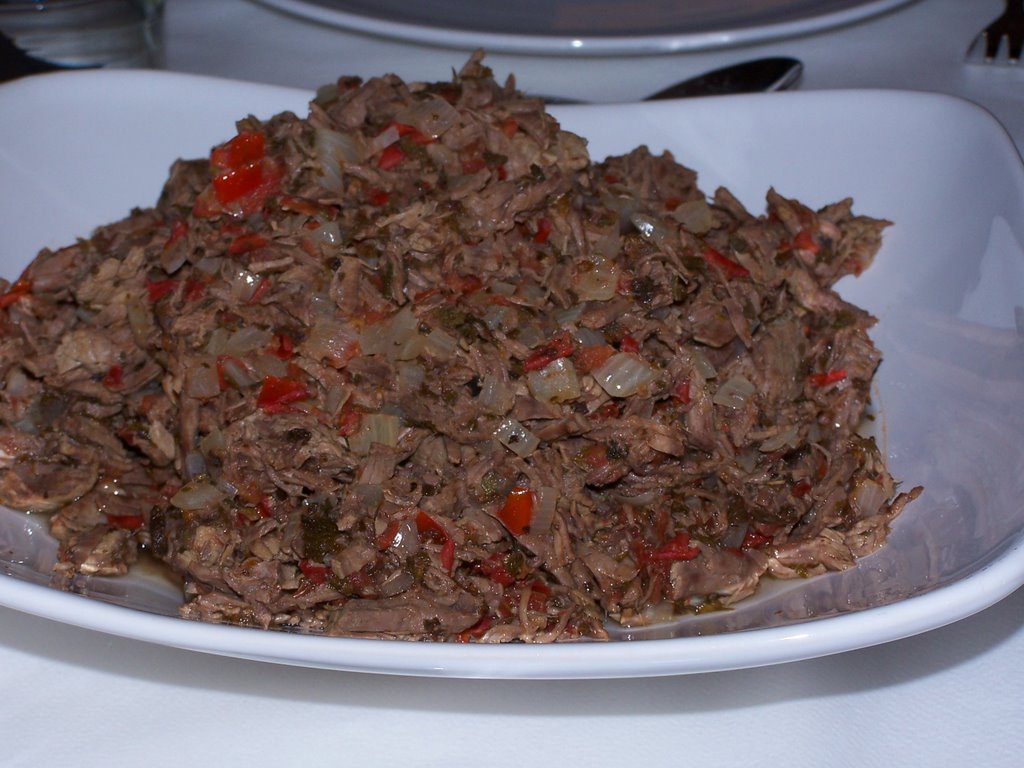
This is another staple in the Xochitl Cooks kitchen. It's fairly easy to make and makes great lunch leftovers the next day- it beats a sandwich anyday! You can use machaca (prounouced ma-cha-ka) as a base for many dishes- not just tacos. It can be a burrito filling, a sope topping or it can be stirred into other ingredients like scrambled eggs. Like Tinga de Pollo, Machaca can feed a lot with a small amount of meat.

Machaca (Taco filling with Beef)

Makes 6-8 tacos

Ingredients:
250g flank or skirt steak
2 tomatoes, chopped
½ onion

olive oil

Preparation:

Place the steak in a small stock pot, cover with water and bring to a boil. Turn the heat down to a simmer and leave to cook for 30-45 minutes depending on the thickness of the steak.

Remove the steak from the pot and allow to cool. Reserve the liquid.

Once cooled, shred the beef, removing any excess fat or sinewy bits.

Heat a skillet to medium heat and add a little olive oil. Sauté the onions until translucent. Add the beef and a ½ cup of the reserved liquid. When the beef has warmed through add the tomatoes and cook until the liquid has reduced to roughly 2 tablespoons (just enough so the bottom of the pan has a thin coating to keep the meat from drying out and sticking to the pan).

Serve with tortillas.

(Recipe Xochitl Ireland)

Along with tortillas, frijoles (beans) are a staple in every Mexican household. The type of frijoles (pronounced free-ho-less) eaten is usually dependant on where you live. Iliana and I have family in the North so we prefer using pinto beans but Johanna, who lived in Mexico City, prefers black beans. Whatever your preference, the cooking method is the same- soak and simmer. My mother uses a slow cooker, I will get her timings and post it on the site soon. Once the beansare cooked, they can be eaten whole or refried (recipe below).

Frijoles (beans)

Ingredients:
Pinto (or black) beans
water
salt

Preparation:

Rinse beans, cover with water and soak overnight, or do this in the morning before work and let it soak during the day.
Remove any floating beans and bring to a boil and cover, cook over low heat so water does not come out the top. You will cook for 2-3 hours until beans are soft when squeezed between your fingers. About once an hour check water level so it doesn’t dry out.
When done add salt to taste, better to under salt. If you add too much salt peel a potato, add it to the beans and cook for half an hour, remove potato.
Store in a covered bowl in the refrigerator for a week if desired.
When cooking beans, every time you put a spoon in the beans make sure it’s clean or beans will spoil faster.

Refried Beans (Frijoles refritos)

Heat oil in frying pan. Add desired amount of beans and heat through. Mash with a potato masher and let it keep cooking over low heat until you see the beans pulling away from the sides of pan.You can fry some onion first and then add the mashed beans – a favourite topping is queso fresco (use Lancashire crumbly).

(Recipes Xochitl Ireland)

Fish Tacos are a Baja thing. Several places in Baja California and in San Diego claim to be the home of the original fish taco; I don't know which place really started the trend but they have become a seller at Mexican restaurants all over the place. If it seems like an odd combination think of it this way (the way I sold it to The Boy)- it's like fish finger sandwich but with a tortilla instead of bread.

Fish Taco photo courtesy of Cooksister.

Tacos de pescado (Fish tacos - Baja style)

Makes 4 tacos (depending on size of fish and tortillas)

Ingredients:

For the filling:
1 white fish fillet
1 cup beer
1 cup water
pinch of chilli powder
frying oil

To serve:
1 small white cabbage, shredded
sour cream
1 lime, cut into wedges
tortillas

Preparation:
Cut the fish into slices/chunks.

Combine the flour and chilli powder. Add the beer and stir until well mixed (batter will be thick).
In a deep pot/ skillet over medium high heat, heat enough oil so that the fish will be partially submerged (if you happen to have a deep fryer, this is even easier).

While the oil heats, coat each piece of fish in the batter and add to the oil being careful not to overcrowd the pot.

Cook for about 2-3 minutes on each side or until golden brown and fish is cooked through.
Place a couple of pieces of fish in each tortilla and top with some cabbage and a dollop of sour cream. Serve with a wedge of lime

(Recipe Xochitl Ireland)

I didn't get any pictures of the other salsas we made or the guacamole so I leave it to your imagination as to what they look like but the recipes are below if you want to give any of them a go. Salsas are quick and easy so no more buying ones in jars! I highly recommend the Chipotle Salsa one- it's spicy and citrussy and can be used as a dip or a sauce.

Chipotle Salsa

Ingredients:
10 chipotle chillies in adobo (deseeded and chopped)
5-6 tomatoes (excess juice drained and tomatoes chopped)
juice of 4-5 limes
1/2 red onion (finely chopped)

Preparation:

Combine all the ingredients in a bowl. More of each of the ingredients can be added to tailor the salsa to your liking.

(Recipe Xochitl Ireland)

Salsa Mexicana (Pico de Gallo)

Ingredients:

6 medium tomatoes (diced)
1 medium onion (finely diced)
2 fresh serrano or jalapeño chillies, (seeded and finely chopped)
1 clove garlic (crushed)
Salt to taste
Juice of 1-2 limes, to taste
1 handful fresh coriander (chopped)

Preparation:

Combine all ingredients (except the coriander) in a bowl, mix through thoroughly and leave to stand for at least 30 minutes before serving. Stir in coriander just before serving.

(Recipe Jo Wagner)

Guacamole

Ingredients:

2 medium avocados (ripe)
1 shallot (finely chopped or crushed)
1 clove garlic (crushed)
½ - 1 finely chopped green chilli (seed them first if you can't stand the heat!)
1 medium tomato (finely diced)
juice of 1 lime
1 handful coriander leaves (chopped)

Preparation:

Cut through the avocados around the seed, scoop the flesh into a bowl and reserve the seeds for later. Mash the flesh up with a fork, mix with the lime juice and combine with all the other ingredients. Keep the guacamole in the bowl with the avocado stone, to prevent it from going brown.

(Recipe Jo Wagner)

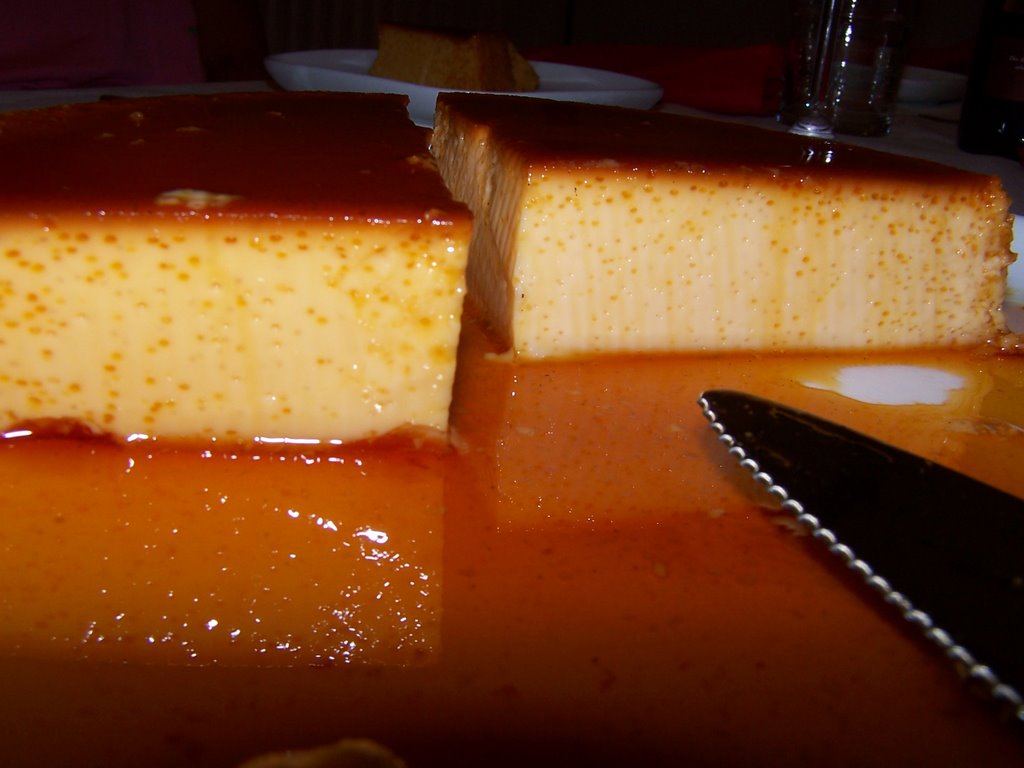
Mexicans have a sweet tooth which could very easily rival that if the Brit. Because of the heat, sweets tend to be fruit or custard based rather than chocolate. Great helados (ice creams) that I remember buying on the beach in the summer in flavours like coconut and tamarind that were homemade, my dad's arroz con leche (rice pudding) that I still make whenever I feel ill and the ultimate dessert- flan. Flan can either be very good or very bad. Luckily, Johanna made a very, very good version that I know I will make again (even if I am the only one in the house who likes flan).

Flan de Fiesta

Ingredients:

230 g and 115 g sugar
6 large eggs
1 can (397 ml) sweetened condensed milk
2 cans (410 ml each) evaporated milk
1 vanilla pod

Preparation:

Pre-heat oven to 160C. You will need 6 ramekins or other oven-proof dish and a large baking pan to put them in.
Pour 230 g sugar and 100 ml water into a non-stick pan over medium heat. Constantly stir sugar until browns and caramelises. Quickly pour into the dish (or divide between ramekins) tilting it to swirl the caramel around the bottom and the sides.

Beat the eggs together with the remaining sugar. Mix in the two milks, then the scraped vanilla seeds. Blend smooth after each ingredient is added.

Pour custard into caramel-lined dish. Place the dish in a large baking dish and fill with boiling water, at least half-way up the sides of the flan dish. Keep an eye on the water and re-fill if evaporating too quickly.
Bake for 60 minutes in the water bath and check with a knife just to the side of the center. If knife comes out clean, it's ready.

Remove and let cool in refrigerator for at least 1 hour. Turn onto a plate, the caramel sauce will flow over the custard.

(Recipe Jo Wagner)

The day was long and labour intensive but it didn’t matter as everyone pitched in to chop, char, peel, bake, shape and gossip. It was a great feeling knowing that everyone who came wanted to learn about a cuisine that the three of us hold so dear. On a non-food, personal note, spending the day chatting to someone else (from the same city as my father) that grew up brown was a nice change (although I will admit that my childhood was a mix of both cultures- turkey at Thanksgiving, tamales at Christmas).When we eventually sat down to our feast it really felt like our love of Mexican food had been passed along and hopefully inspired everyone to go beyond the prepacked stodge that tries to pass itself off as Mexican food.

Sunday, November 26, 2006

Sugar High Friday - Chocolate Truffles

When Johanna said that she was hosting Sugar High Friday and was choosing truffles as the theme, I was a bit apprehensive about playing along. I'd never made chocolate truffles before and more importantly, I don't go weak in the knees at the thought of being given a box of chocolates. Yes, I like chocolate but I don't LOVE it. I'm not the kind that orders anything as long as it's chocolate on a dessert menu. I do like some truffles but I am a picky bastard when it comes to the ones that The Boy is allowed to bribe me with. Salted Caramel Truffles from L'Artisan du Chocolat, English Creams (especially the violet ones- it makes me feel like a granny) from Rococo, any extra dark chocolate from La Maison du Chocolat - to name a few. The chocolate has to be dark and the filling has to be different.

But what the hell I thought, why not. I usually have a bar or two of dark chocolate stored away in the cupboard for a rainy day so I could use it up before my holiday. The next question was- how do I make chocolate truffles? One rather shitty afternoon earlier this week, I received what must've been a sign that I should do this. Whilst doing errands for work, I saw this month's cover of Bon Appetit- CHOCOLATE TRUFFLES. End of discussion. I was in.

I used the recipe from an article on Katrina Markoff of Vosges Haut Chocolat as the base. Once I made a few traditional bittersweet truffles and felt that it wasn't going to go pear shaped, I ventured out into unknown territory creating flavours like chili and lemon-thyme (my combinations and shortcuts follow the recipe).

The recipe uses American measurements; if you don't have U.S. measuring cups, just keep in mind that the chocolate and cream are nearly used in equal measure but there is a dash more cream.

Bittersweet Chocolate Truffles (from Bon Appetit Dec 06)

Makes about 30 truffles

Ingredients:

Truffle Base:
1 ¼ cups heavy whipping cream (I used double cream)
9 ounces high quality bittersweet (dark) chocolate (70% cocoa, I used 72%), chopped, divided

Chocolate Coating:
8 ounces high quality bittersweet (dark) chocolate (70% cocoa, I used 72%), chopped

Optional:
Unsweetened cocoa powder for rolling

For truffle base:

Bring cream to simmer in heavy small saucepan. Remove from heat; cool to lukewarm, 10 minutes.

Meanwhile, stir 7 ounces of chocolate in metal bowl over saucepan of simmering water until smooth. Remove from heat. Add 2 ounces of chocolate; stir until smooth. Stir in cream. Chill truffle base until firm enough to roll, about 3 hours.

Line rimmed baking sheet with waxed paper. Roll 2 teaspoons truffle base between fingertips into ball. Transfer to prepared sheet. Repeat with remaining truffle base. Chill until firm, about 1 hour.

For chocolate coating:

Line another baking sheet with waxed paper. Stir chocolate in metal bowl over saucepan of simmering water just until melted. Remove from heat. Cool slightly.

Scoop some of warm (not hot) melted chocolate into palm of hand. Place 1 chilled truffle in hand and roll in palm to coat. Transfer to prepared sheet. Repeat with remaining melted chocolate and truffles, rewarming chocolate if necessary.

Roll in cocoa powder if desired.

Chill until firm, about 1 hour.

Let stand at room temperature 1 hour before serving.
I used that recipe as the base for my truffles but I deviated and experimented with methods and fillings. To start, I didn’t use two baking sheets I used one and then taped some parchment paper onto the countertop since my kitchen tends to be on the chilly side (a good excuse to bake things). I also used a melon baller to shape the truffles.

The Truffle article does give suggested variations on the truffles- balsamic truffles and mango curry truffles (not too sure on that one) – but the added flavourings need to infuse the cream before being mixed into the chocolate. There were only so many batches of truffle base I could make (which was two) so I rewarmed portions of the base and stirred in the extras. Be careful not to overheat the truffle base. Warm it just enough so that the additions can be mixed in then rechilled and make into balls.

My versions are listed below and all but the last two have had bits stirred into the already prepared base. The last two were made from scratch where the cream was infused with flavouring.

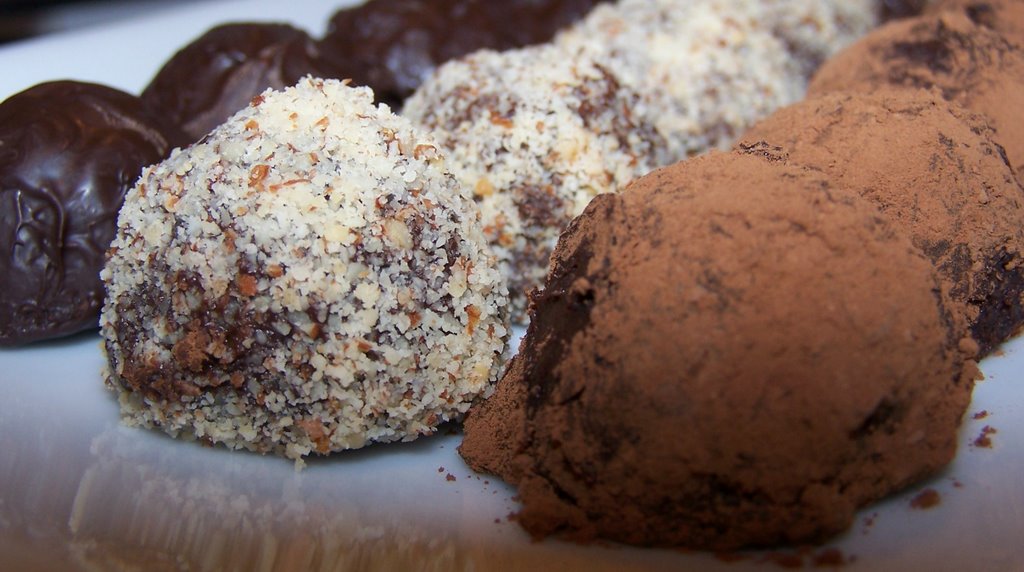
Version 1: Plain dark chocolate rolled in chocolate then coated with chopped salted almonds. (Picture right, middle truffle)

Version 2: Chocolate Raspberry- Two small teaspoons of raspberry jam was stirred into the base and coated with chocolate. (Picture right, far left truffle)

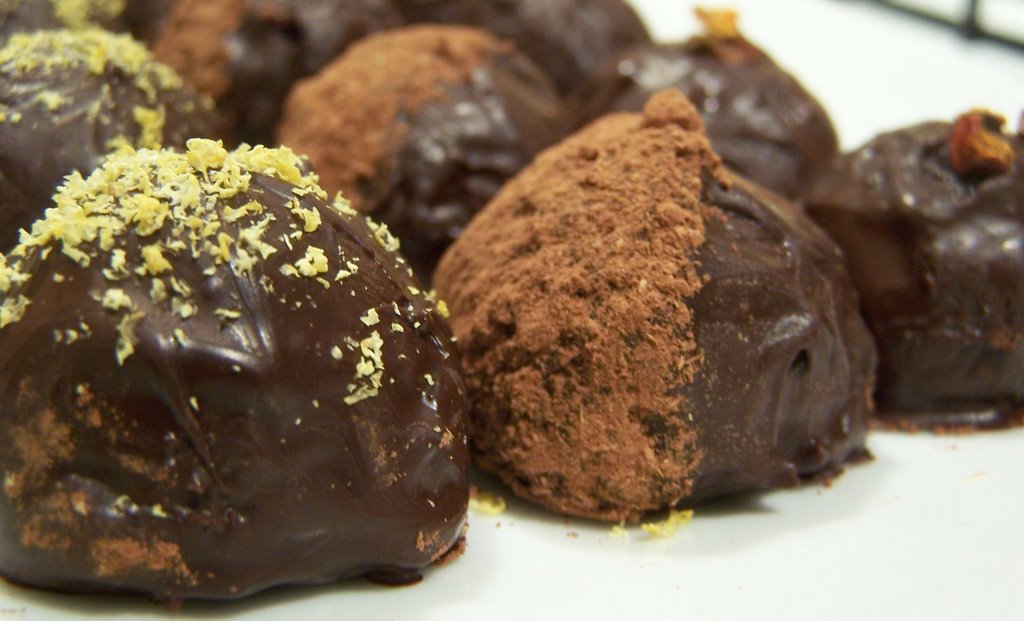
Version 3: Cranberry Kirsch- Two teaspoons of kirsch was stirred in as well as a handful of dried cranberries that I had blitzed into a pulp. The pulp wanted to clump together in the base so next time I would probably finely chop them instead. The balls were then coated chocolate and cocoa and marked with a small X on top. (Top picture)

Version 4: Chile- Half a dried Pasilla chile was finely chopped and stirred into the base. The final ball was coated in chocolate and one side was dipped in a mixture of cocoa and cinnamon. (Picture left, middle truffle)

Version 5: Lemon Thyme- The original recipe gave a recipe for Meyer Lemon and Thyme neither of which I had so I infused the cream with the leaves from a couple of sprigs of lemon thyme for 20 minutes. Afterwards, I squeezed a wedge of lemon and stirred the zest of half a lemon into the cream mix, which was then added to the chocolate. That was then coated in chocolate and sprinkled with some lemon zest on top. (Picture left, far left)

Version 6: Jasmin Fruits Concassees- Ginny sent me a pack of jasmine scented dried fruits and challenged me to experiment with it. The fruits look like a tea so I infused a couple of teaspoons on the cream for 10 minutes before straining it into the chocolate base. The truffles were rolled into chocolate with a couple bits of jasmine fruits on top. (Picture above, far right)

Although the prep and rolling of the truffles is time consuming, it isn’t a difficult item to make and I would make again for my Christmas goody bags. I can imagine that it would be a great rainy day messy activity for kids. For someone who isn’t a chocolate fanatic, I have shed loads of the stuff. I have eaten enough during the process that I’m not sure I want anymore so my mates at work (and The Boy’s work) will end up with chocolate filled bellies. I hope that when Johanna reads this she realises that some of these are going to magically appear in her fridge when I see her next week!